Paper Mache Recipe No Cook
In the world of art and craft, paper mache has been a beloved technique for creating unique and intricate sculptures, masks, and other three-dimensional creations. Traditionally, paper mache involves a cooking process to create the paste mixture. However, if you’re looking for a quicker and more convenient way to indulge in this creative endeavor, a no-cook paper mache recipe might be just what you need!
Why Use a No-Cook Recipe for Paper Mache?
Using a no-cook recipe for paper mache offers several advantages. Firstly, it saves you the time and effort of cooking the paste mixture, allowing you to dive right into your creative project. Additionally, the no-cook method is more suitable for those who are concerned about using heat sources in their artistic endeavors, such as children or individuals with limited access to cooking equipment. It enables a wider range of people to engage in the joy of paper mache, regardless of their circumstances.
Furthermore, using a no-cook recipe for paper mache can also be more convenient for those who may not have access to a stove or cooking facilities. This makes it a great option for outdoor art projects or for those who want to create paper mache on the go. Additionally, the ingredients used in a no-cook recipe are often readily available and inexpensive, making it a cost-effective choice for artists on a budget. So whether you’re a beginner or an experienced artist, a no-cook recipe for paper mache can provide a hassle-free and accessible way to bring your creative ideas to life.
Essential Ingredients for No-Cook Paper Mache Recipe
To create the paste mixture, you’ll need a few key ingredients. The primary component is flour, which acts as the binding agent. You’ll also need water to achieve the desired consistency and some form of adhesive, such as white glue or wallpaper paste. These ingredients are readily available and affordable, making the no-cook paper mache recipe accessible to everyone.
In addition to the basic ingredients, you can also add other materials to enhance your paper mache mixture. For added strength and durability, consider incorporating a small amount of salt into the paste. This will help prevent mold growth and make your finished project more resistant to moisture.
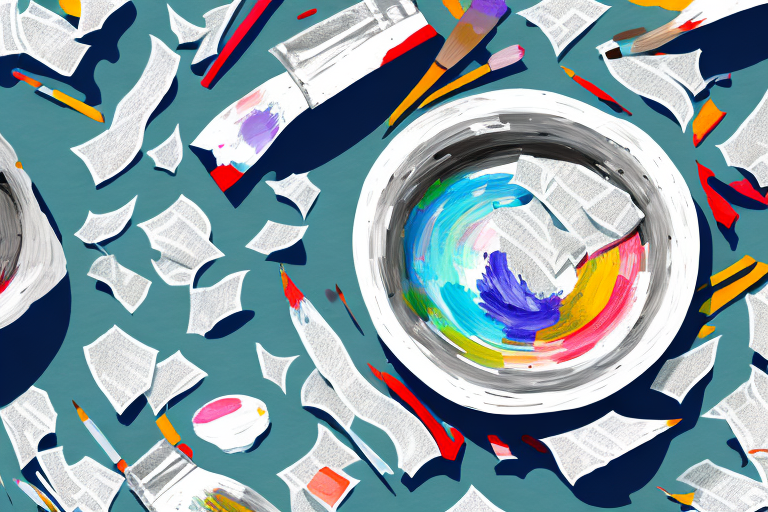
If you want to add color to your paper mache creation, you can mix in acrylic paint or food coloring to the paste mixture. This allows you to create vibrant and eye-catching designs without the need for additional painting after the paper mache has dried.
Step-by-Step Guide to Making Paper Mache Without Cooking
Now, let’s walk through the step-by-step process of making paper mache without cooking. Begin by preparing your workspace with protective covering to avoid any mess. Then, mix equal parts flour and water in a bowl until you achieve a smooth and creamy consistency. This will serve as your base paste mixture. To enhance the stickiness and strength of the paste, gradually add adhesive, such as white glue, while stirring continuously. Adjust the amount of adhesive based on your desired thickness and texture. Once your paste is ready, tear or cut strips of newspaper or other types of paper into manageable sizes. Dip each strip into the paste, making sure it is fully coated, and then apply it to your chosen structure or armature. Continue layering the paper strips until the desired thickness is achieved. Allow your creation to dry completely, which may take a few days, depending on the size and complexity of your project. Once dry, you can paint, decorate, and seal your masterpiece as desired.
When choosing a structure or armature for your paper mache project, consider using materials such as wire, cardboard, or balloons. These materials provide a sturdy base and can be easily shaped or molded to create the desired form. If using a balloon, make sure to secure it to a stable surface to prevent it from rolling or moving during the paper mache process.
In addition to newspaper, you can also use other types of paper for your paper mache project. Consider using tissue paper, construction paper, or even old magazines for added texture and visual interest. Experiment with different types of paper to achieve unique effects and designs in your final piece.
Tips for Choosing the Right Type of Paper for No-Cook Paper Mache
When working with no-cook paper mache, it’s important to choose the right type of paper to ensure the best results. Newspaper is a popular choice due to its affordability and availability. However, you can also experiment with other types of paper, such as tissue paper, magazine pages, or even recycled materials. Each type of paper offers unique texture and characteristics that can add depth and visual interest to your project. Consider the final look you want to achieve and select the paper accordingly.
Another factor to consider when choosing the right type of paper for no-cook paper mache is its absorbency. Different papers have varying levels of absorbency, which can affect how well they adhere to the base and how easily they can be molded. For example, newspaper tends to be highly absorbent, making it easier to work with and shape. On the other hand, tissue paper may be less absorbent, requiring more layers to achieve the desired strength and texture.
In addition to absorbency, the thickness of the paper is also important to consider. Thicker papers, such as cardstock or cardboard, can provide more structural support and durability to your paper mache project. They are ideal for creating larger or more intricate designs that require added strength. However, thinner papers like tissue paper or magazine pages can be used for delicate or lightweight projects, allowing for more flexibility and ease of manipulation.
How to Prepare the Paste Mixture for No-Cook Paper Mache
Preparing the paste mixture for your no-cook paper mache project requires a careful balance of ingredients. Combine flour and water in equal parts, gradually adding adhesive to improve strength and stickiness. The precise measurements may vary depending on the size and complexity of your project, as well as personal preference. Remember to stir the mixture thoroughly to avoid lumps and achieve a smooth and consistent texture. Experiment with different ratios of flour, water, and adhesive until you find the perfect balance for your specific needs.
Once you have achieved the desired consistency of your paste mixture, it is important to let it sit for a few minutes before using it. This allows the ingredients to fully combine and the paste to thicken slightly, making it easier to work with. Additionally, if you find that your paste is too thick, you can add a small amount of water to thin it out. On the other hand, if the paste is too thin, you can add more flour to thicken it. Remember, the consistency of the paste will affect the drying time and the overall strength of your paper mache project, so it is worth taking the time to get it just right.
Exploring Different Techniques to Create Texture and Structure in No-Cook Paper Mache
No-cook paper mache offers a range of exciting possibilities for creating texture and structure in your artwork. One technique involves adding layers of tissue paper between the newspaper layers to create a smoother and more refined surface. Another option is incorporating wire or other materials as armatures to provide support and shape to your sculptures. You can also experiment with different application methods, such as crumpling or folding the paper strips, to achieve unique textures and patterns. Let your imagination soar as you explore these various techniques and discover the limitless potential of no-cook paper mache.
In addition to these techniques, you can also consider using various household items to create texture and structure in your no-cook paper mache projects. For example, you can use bubble wrap to create a bubbly texture or corrugated cardboard to add a ridged effect. Another option is to incorporate fabric or lace into your paper mache layers to create interesting patterns and textures. Don’t be afraid to think outside the box and experiment with different materials to achieve the desired texture and structure in your artwork.
Adding Color to Your No-Cook Paper Mache Creations
No-cook paper mache creations often come to life with the addition of color. Once your project is dry, you can paint it using acrylics, watercolors, or any other type of paint suitable for your chosen surface. Consider using multiple layers of paint to achieve depth and dimension. Alternatively, you can incorporate colored paper or tissue during the layering process to create vibrant and visually stunning effects. The choice of colors and techniques is entirely up to you, allowing you to unleash your creativity and bring your paper mache creations to life.
When choosing colors for your no-cook paper mache creations, consider the overall theme or concept of your project. For example, if you are creating a tropical-themed mask, you may want to use bright and vibrant colors such as shades of green, blue, and yellow. On the other hand, if you are making a realistic animal sculpture, you may opt for more natural and muted tones to achieve a lifelike appearance.
Experimenting with different painting techniques can also add interest and texture to your paper mache creations. You can try dry brushing to create a weathered or aged effect, or use a sponge to dab on paint for a textured look. Additionally, you can use stencils or masking tape to create patterns or designs on your project, adding another layer of visual appeal.
Drying and Sealing Methods for No-Cook Paper Mache Projects
The drying process is a crucial step in any paper mache project. After applying all the layers and completing your desired design, allow your creation to dry fully. This typically takes a few days, but may vary depending on the size and thickness of your project. Ensure proper ventilation to avoid moisture buildup, as it can lead to mold or weakness in the structure. Once completely dry, you may choose to seal your artwork to protect it from external elements such as moisture or dust. Clear varnish or mod podge can be applied using a brush or spray. These products not only provide a protective layer but also enhance the overall appearance of your creation.
When choosing a drying location for your paper mache project, consider a well-ventilated area with low humidity. Avoid placing it near direct heat sources, as this can cause the paper to warp or crack. If you’re in a hurry, you can use a fan or a hairdryer on a low heat setting to speed up the drying process, but be cautious not to overheat the paper.
Sealing your paper mache artwork not only protects it from moisture and dust but also adds durability. If you prefer a glossy finish, opt for a high-gloss varnish. For a more matte appearance, choose a matte sealant. Apply the sealant in thin, even coats, allowing each layer to dry before adding another. This will ensure a smooth and professional-looking finish. Remember to clean your brush or spray nozzle thoroughly after each use to prevent the sealant from drying and clogging the applicator.
Common Mistakes to Avoid when Using a No-Cook Recipe for Paper Mache
While using a no-cook recipe for paper mache is relatively simple, there are a few common mistakes to avoid. One mistake is using too much water, which can make the mixture too thin and weaken the structure of your project. Another mistake is adding too much adhesive, resulting in a sticky and messy consistency that becomes difficult to work with. It’s important to find the right balance between the ingredients to achieve the desired texture and strength. Additionally, rushing the drying process can lead to warping or cracking of your artwork. Allow sufficient time for each layer to dry completely before adding more. Patience is key when working with no-cook paper mache!
Another common mistake to avoid when using a no-cook recipe for paper mache is not properly preparing the materials. It is important to tear or cut the newspaper into small strips or pieces before mixing it with the adhesive. This allows for easier application and smoother results. Additionally, make sure to remove any excess water from the newspaper strips before using them in the mixture. Wet newspaper can dilute the adhesive and affect the overall strength of the paper mache.
Furthermore, it is crucial to protect your work surface and surrounding area when working with paper mache. The mixture can be messy and may stick to surfaces if not properly contained. Consider using a plastic tablecloth or newspaper to cover your workspace and have a damp cloth or sponge nearby to quickly clean up any spills or drips. Taking these precautions will make the cleanup process much easier and prevent any damage to your work area.
Upcycling Ideas: Using Recycled Materials with No-Cook Paper Mache
No-cook paper mache provides an excellent opportunity for upcycling and using recycled materials. Look around your home or community for discarded items that can serve as armatures or structures for your projects. For example, cardboard boxes, plastic bottles, or wire mesh can be repurposed and incorporated into your artwork. By giving these materials a new life through paper mache, you’re not only creating unique and eco-friendly creations, but also contributing to a sustainable future.
In addition to using discarded items as armatures or structures, you can also incorporate other recycled materials into your no-cook paper mache projects. Consider using old newspapers or magazines as the base for your paper mache mixture. These materials can be torn into strips and layered onto your armature, providing a sturdy and environmentally-friendly foundation for your artwork. Additionally, you can add a touch of color and texture to your creations by incorporating bits of recycled tissue paper or fabric scraps into the paper mache mixture. This not only adds visual interest to your artwork but also reduces waste by giving new life to materials that would otherwise be thrown away.
Inspiration Gallery: Amazing Artwork Created with No-Cook Paper Mache
To ignite your creative spark, here’s a gallery of amazing artwork created with no-cook paper mache. From intricate sculptures to detailed masks, these creations showcase the versatility and beauty of this technique. Allow these works of art to inspire and motivate you as you embark on your own paper mache journey. Remember, the possibilities are endless, and the only limit is your imagination.
As you can see, no-cook paper mache opens up a whole new world of possibilities for art enthusiasts of all ages and skill levels. Whether you’re a seasoned artist or a beginner looking to explore your creative side, this convenient and accessible technique allows you to unleash your imagination and create stunning pieces of art. So gather your materials, follow the steps outlined here, and let the magic of paper mache unfold before your eyes!
One of the advantages of using no-cook paper mache is its simplicity and ease of use. Unlike traditional paper mache, which requires cooking a paste mixture, no-cook paper mache eliminates the need for any cooking or heating. This makes it a convenient option for artists who want to dive right into their projects without any extra preparation time.
In addition to its convenience, no-cook paper mache also offers a wide range of possibilities in terms of texture and finish. By experimenting with different materials and techniques, artists can create surfaces that are smooth, rough, or even textured. This versatility allows for endless creativity and the ability to achieve unique effects in your artwork.