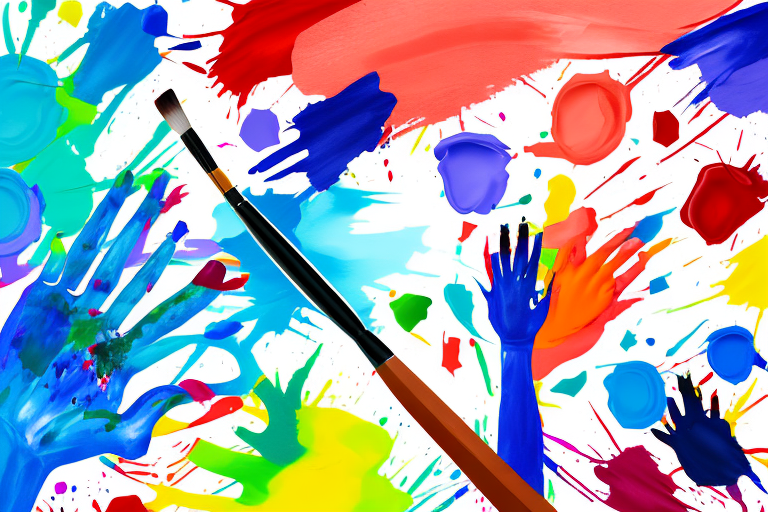
Homemade Finger Paint No Cook
In today’s fast-paced world, it’s easy to overlook the simple joys of childhood. With technology consuming our lives, it’s important to take a step back and engage in activities that stimulate our creativity and imagination. One such activity is finger painting, a timeless art form that allows children to explore the world of colors and textures. But why settle for store-bought finger paint when you can easily whip up your own homemade version? In this article, we’ll explore the benefits of making your own finger paint, provide a step-by-step guide to creating a no-cook version, and share some creative ideas for using this homemade delight.
Why Make Your Own Finger Paint?
There are several compelling reasons why making your own finger paint is a worthwhile endeavor. First and foremost, you have total control over the ingredients, ensuring that your child is using a safe and non-toxic product. Many store-bought finger paints contain harmful chemicals that can cause skin irritations or allergic reactions. By using natural ingredients found in your pantry, you can rest easy knowing exactly what your child is putting on their skin.
Furthermore, making your own finger paint allows you to customize the colors and consistencies to suit your child’s preferences. You can create vibrant hues by mixing different food coloring or incorporate textures by adding additional ingredients such as glitter or sand. This personalization adds an extra layer of fun and engagement to the finger painting experience.
Another advantage of making your own finger paint is the cost-effectiveness. Store-bought finger paints can be quite expensive, especially if you frequently engage in finger painting activities with your child. By making your own, you can save money and have a constant supply of finger paint readily available whenever inspiration strikes.
Easy and Fun DIY Finger Painting Activity
If you’re looking for an activity that will keep your child entertained and spark their creativity, look no further than DIY finger painting. Not only is it an enjoyable experience for children, but it also provides numerous benefits for their development. Finger painting promotes fine motor skills, hand-eye coordination, and sensory exploration. It allows children to express their emotions and thoughts through art, fostering self-expression and creativity.
To kick-start your DIY finger painting adventure, gather the following simple ingredients: cornstarch, water, food coloring or liquid watercolor, and containers for mixing. A mixing bowl, spoon, and paintbrush can also be handy for creating different textures and designs. Once you have everything ready, follow this step-by-step guide to create your own no-cook finger paint.
One of the great things about DIY finger painting is that it can be done both indoors and outdoors. If you’re worried about the mess, you can easily set up a designated area with a plastic tablecloth or newspaper to protect your surfaces. This allows your child to freely explore and experiment with the paint without any worries.
Another benefit of DIY finger painting is that it can be a great sensory experience for children. The texture of the paint on their fingers and the different sensations they feel as they spread the paint on paper can help stimulate their senses and enhance their cognitive development. It’s a wonderful way for them to engage with their environment and learn through hands-on exploration.
No Cook Finger Paint: A Mess-Free Solution
If the thought of dealing with a cooking process and potential mess is deterring you from making finger paint, worry not. Our no-cook finger paint recipe is a mess-free solution that requires minimal preparation and cleanup. You can have your child happily engaged in finger painting in no time, without any fuss or stress. So let’s dive into the simple ingredients you’ll need.
For our no-cook finger paint recipe, you’ll need the following simple ingredients:
- 1 cup of flour
- 1 cup of water
- Food coloring or liquid watercolors
- Small containers or bowls for mixing
- Paintbrushes or sponges
To make the finger paint, start by mixing the flour and water together in a bowl until you achieve a smooth consistency. If the mixture is too thick, add a little more water. If it’s too runny, add a bit more flour. Once you have the desired consistency, divide the mixture into separate containers or bowls, depending on how many colors you want to create.
Next, add a few drops of food coloring or liquid watercolors to each container and mix well. You can experiment with different color combinations to create a vibrant palette for your child to work with. Encourage them to explore mixing colors together to create new shades.
Finally, provide your child with paintbrushes or sponges and let their creativity run wild! They can use their fingers, hands, or even objects like leaves or stamps to create unique textures and patterns on paper or other surfaces.
Once they’re done, the finger paint can easily be cleaned up with water. It’s a hassle-free activity that allows your child to express themselves artistically while developing their fine motor skills and sensory awareness.
Simple Ingredients for Homemade Finger Paint
The beauty of homemade finger paint lies in its simplicity. You don’t need a long list of exotic ingredients; rather, you can create a vibrant palette of colors with just a few items from your kitchen. Here’s what you’ll need:
- 1 cup cornstarch
- 4 cups water
- Food coloring or liquid watercolor (assorted colors)
- Containers for mixing (jars or cups work well)
Once you have gathered all the ingredients, making homemade finger paint is a breeze. Start by combining the cornstarch and water in a saucepan over medium heat. Stir the mixture constantly until it thickens and reaches a smooth, pudding-like consistency. Remove the saucepan from the heat and let the mixture cool.
Next, divide the mixture into separate containers for each color of finger paint you want to create. Add a few drops of food coloring or liquid watercolor to each container and mix well. Feel free to experiment with different color combinations to create unique shades.
Once your finger paint is ready, it’s time to unleash your creativity! Use brushes, sponges, or simply your fingers to paint on paper, cardboard, or any other suitable surface. Let your artwork dry completely before displaying or storing.
Step-by-Step Guide to Making No Cook Finger Paint
Now that you have gathered the ingredients, it’s time to let your inner artist shine by creating your no-cook finger paint. Follow these simple steps:
- In a large mixing bowl, combine the cornstarch and water. Stir until the cornstarch is completely dissolved.
- Divide the mixture into separate containers, depending on how many colors you want to create.
- Add a few drops of food coloring or liquid watercolor to each container, adjusting the amount to achieve your desired intensity of color.
- Stir the mixture in each container thoroughly until the color is evenly distributed.
And voila! Your homemade finger paint is ready to use. Be sure to cover the containers when not in use to prevent drying out. Now, let’s explore the incredible benefits of homemade finger paint for kids.
Homemade finger paint offers numerous benefits for kids. Firstly, it is a safe and non-toxic alternative to store-bought paints, ensuring that children can freely explore their creativity without any harmful chemicals. Additionally, making finger paint at home allows for customization, as you can adjust the colors and consistency according to your child’s preferences.
Furthermore, finger painting is not only a fun activity but also promotes sensory development in young children. The tactile experience of using their fingers to create art helps improve their fine motor skills and hand-eye coordination. It also encourages self-expression and imagination, as children can freely experiment with different colors and textures.
Benefits of Homemade Finger Paint for Kids
Homemade finger paint offers a wide array of benefits for children’s development and well-being. Here are some of the key advantages:
- Safe and Non-Toxic: By using natural ingredients, you ensure that your child is playing with a safe and non-toxic product without the worry of harmful chemicals.
- Sensory Exploration: Finger painting allows children to engage their senses, fostering sensory exploration and cognitive development.
- Fine Motor Skills: The act of finger painting promotes the development of fine motor skills as children learn to control their hand movements and manipulate the paint on the paper.
- Self-Expression and Creativity: Finger painting provides an open-ended experience that allows children to express themselves creatively, building confidence and self-esteem.
- Bonding Time: Engaging in finger painting with your child creates an opportunity for quality bonding time, fostering a stronger parent-child relationship.
The Importance of Sensory Play in Child Development
Sensory play plays a crucial role in the holistic development of children. It allows them to explore and understand the world around them through their senses. Finger painting, with its vibrant colors and unique textures, offers an ideal sensory play activity. It stimulates multiple senses simultaneously, including touch, sight, and sometimes even smell if scented ingredients are used. Through sensory play, children enhance their cognitive, social, emotional, and physical development.
Creative Ways to Use Homemade Finger Paint
Now that you have your homemade finger paint ready, let’s explore some creative ideas to make the most out of this delightful medium:
- Handprint Art: Encourage your child to create handprints on paper or canvas using different colors of finger paint. These handprints can serve as sentimental gifts or beautiful wall decorations.
- Stamping and Stenciling: Introduce various stamps and stencils for your child to explore different shapes and patterns with finger paint. This activity enhances fine motor skills and can be combined with storytelling for added fun.
- Mixing Colors: Teach your child about color theory by providing primary colors and encouraging them to experiment with mixing and blending to create new shades.
- Outdoor Canvas: Take the finger painting adventure outside and let your child explore nature as their canvas. Painting on leaves, rocks, or even the sidewalk adds an exciting twist to this classic activity.
Remember, the possibilities are endless, so encourage your child’s imagination to soar and allow them to explore their artistic side through various finger painting techniques.
Exploring Color Mixing with No Cook Finger Paint
Color mixing is an essential aspect of finger painting and offers a valuable learning opportunity. With homemade finger paint, you can easily introduce your child to the fascinating world of color theory. Start by providing the primary colors (red, blue, and yellow) and inviting your child to experiment with mixing to create secondary colors (orange, green, and purple).
Through this hands-on experience, your child will gain a deeper understanding of how colors interact and blend together. Watching their delight as they create new shades and shades will be a rewarding experience for both parent and child.
Safe and Non-Toxic Finger Paint Recipe for Kids
As parents, safety is our utmost concern. By opting for homemade finger paint, you can ensure that your child’s creative endeavors are not only enjoyable but also safe. This simple and non-toxic recipe guarantees hours of worry-free finger painting fun:
- 1 cup cornstarch
- 4 cups water
- Food coloring or liquid watercolor (assorted colors)
- Containers for mixing (jars or cups work well)
By using these readily available ingredients, you eliminate the risk of exposing your child to potentially harmful chemicals found in store-bought alternatives. Plus, you can always make new batches of finger paint to suit your child’s preferences without breaking the bank.
How to Store and Preserve Your Homemade Finger Paint
Proper storage and preservation are key to ensuring the longevity of your homemade finger paint. Here are a few tips to keep your finger paint fresh and ready for countless artistic sessions:
- Transfer the finger paint into airtight containers, such as jars with lids or sealable plastic bags.
- Label each container with the color and date of creation to help you keep track.
- Store the containers in a cool and dry place, away from direct sunlight or extreme temperatures.
- If the paint starts to dry out, simply add a few drops of water and mix thoroughly to restore its original consistency.
Following these storage guidelines will ensure that your homemade finger paint remains usable for an extended period, allowing your child to continue their artistic journey whenever inspiration strikes.
Engaging Art Projects for Toddlers with No Cook Finger Paint
Engaging toddlers in art projects not only encourages their creativity but also aids in their cognitive and motor skill development. Here are some engaging art projects that you can try with your little one using your homemade no-cook finger paint:
- Bubble Wrap Stamping: Cut small pieces of bubble wrap and dip them in finger paint. Let your toddler stamp them onto paper to create unique patterns and textures.
- String Painting: Dip string or yarn into finger paint and let your toddler create abstract designs by placing the string onto paper and lifting it up to reveal colorful lines.
- Finger Puppet Theater: Cut out finger puppets from cardboard and have your toddler paint them using finger paint. Once dry, your child can enjoy putting on delightful finger puppet shows.
- Texture Exploration: Provide different textured materials, such as sponges, cotton balls, or leaves, and let your toddler dip them in finger paint to create unique and textured artwork.
These art projects engage the senses, foster creativity, and provide an opportunity for your toddler to experiment with different materials and techniques. So grab your homemade finger paint, and let the artistic adventures begin!
Messy Play Ideas: Finger Painting with Homemade Recipes
Embracing messiness is an essential part of the finger painting experience. While it may seem intimidating at first, providing a space for your child to truly explore and get messy has numerous benefits. Sensory play such as finger painting stimulates brain development, enhances problem-solving skills, and promotes creativity.
To contain the mess and make cleanup easier, set up a designated finger painting area. Lay down a plastic tablecloth or use an old newspaper or shower curtain to protect the floor. Dress your child in old clothes or provide an apron to keep their clothing clean. Remember, messiness is temporary, but the memories and enjoyment your child gains from finger painting will last much longer.
DIY Finger Paint: A Budget-Friendly Alternative to Store-Bought Brands
In today’s economy, finding ways to save money while still providing enriching experiences for your child is essential. Creating your own finger paint is not only a fun and safe activity but also a budget-friendly alternative to store-bought brands. The ingredients needed for homemade finger paint are inexpensive and readily available, making it a cost-effective choice for countless hours of artistic fun.
In addition to being cost-effective, making your own finger paint fosters resourcefulness and creativity. It encourages you and your child to think outside the box, experiment with different ingredients, and create your unique color palettes.
In conclusion, homemade finger paint offers a fantastic opportunity for children to explore their creativity, engage their senses, and express themselves through art. By creating your own no-cook finger paint, you can ensure the safety and non-toxicity of the product while tailoring it to your child’s preferences. It’s a budget-friendly, fun, and educational endeavor that will provide countless hours of joyful and messy play for you and your little ones. So why not embark on this finger painting adventure today and unlock the wonders of color and imagination!